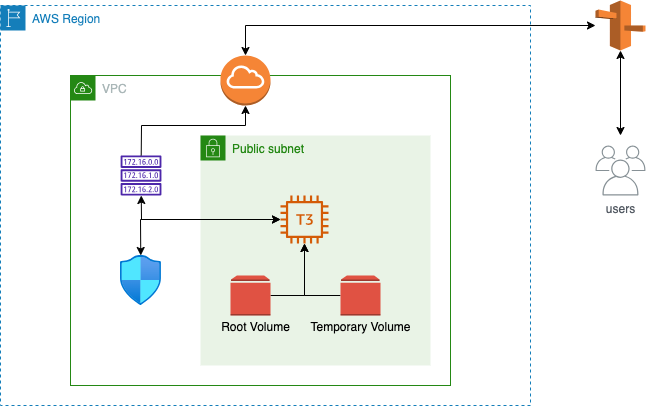
Introduction:
In the world of cloud computing, optimizing costs without compromising performance is a key concern. AWS offers Elastic Block Store (EBS) volumes for data storage, but sometimes you need additional space temporarily. In this blog, we’ll walk you through the process of creating a temporary EBS volume, attaching it to an EC2 instance, mounting it to a specific directory, performing your tasks, unmounting the disk, and then automatically deleting the volume. This approach not only expands your storage but also prevents unnecessary costs.
Step 1: Creating a Temporary EBS Volume:
- Navigate to the AWS Management Console and access the EC2 Dashboard.
- Click on “Volumes” and then “Create Volume.”
- Configure the volume details such as size, availability zone, and volume type.
- Click “Create Volume.”
Step 2: Attaching the EBS Volume to the EC2 Instance:
- In the EC2 Dashboard, go to “Volumes.”
- Right-click the newly created volume and select “Attach Volume.”
- Choose the EC2 instance to attach the volume to.
- Specify the device name (e.g.,
/dev/xvdf) and click “Attach.”
Step 3: Mounting the EBS Volume:
- SSH into your EC2 instance.
- Run
lsblkto identify the attached EBS volume. - Check if the volume has any data using the following command
sudo file -s /dev/xvdf
If the above command output shows “/dev/xvdf: data“, it means your volume is empty. - Check the filesystem:
lsblk -fs - Format the volume of ext4 filesystem using the following command:
sudo mkfs -t ext4 /dev/xvdf
Format the volume of xfs filesystem using the following command:
sudo mkfs -t xfs /dev/xvdf - Create a directory of your choice to mount our newly formatted volume. I am creating a directory inside my home directory as “mnt”
sudo mkdir /home/mnt - Mount the volume to “/home/mnt” directory using the following command.
sudo mount /dev/xvdf /home/mnt - Check the disk space to validate the volume mount:
cd /home/mnt
df -h .
Step 4: Performing Tasks and Unmounting:
- Perform your required tasks using the mounted volume.
- Once done, unmount the volume:
sudo umount /mnt/my_temp_volume. - Confirm the unmount using
lsblkto ensure no active mounts.
Step 5: Deleting the EBS Volume:
- In the EC2 Dashboard, locate the volume.
- Ensure the volume is unmounted from the instance.
- Right-click the volume and select “Delete Volume.”
- Confirm the deletion.
Automation for Cost Savings:
To further streamline the process and avoid manual cleanup, you can leverage AWS Lambda functions, AWS CloudWatch Events, or other automation tools to automatically unmount and delete the temporary EBS volume after a specified period or when a specific condition is met.
Conclusion:
Creating temporary EBS volumes, attaching them to EC2 instances, performing tasks, and then automatically unmounting and deleting the volumes is an efficient way to manage storage and control costs in AWS. By automating the cleanup process, you ensure that unused resources are promptly removed, contributing to a more optimized cloud experience. Remember, cost-conscious practices are an integral part of successful cloud management and can greatly impact your cloud expenditures in the long run.
